Understand tattoo needle types for precision and artistry
TL;DR:
- Choosing the appropriate tattoo needle configuration is essential for controlling line quality, ink saturation, and skin trauma. Artists should understand needle groupings, gauge, taper, and the task-specific benefits of round liners, magnums, flats, and specialty needles to achieve optimal results. Regular experimentation and careful selection based on style, placement, and ink viscosity significantly enhance tattoo performance and healing outcomes.
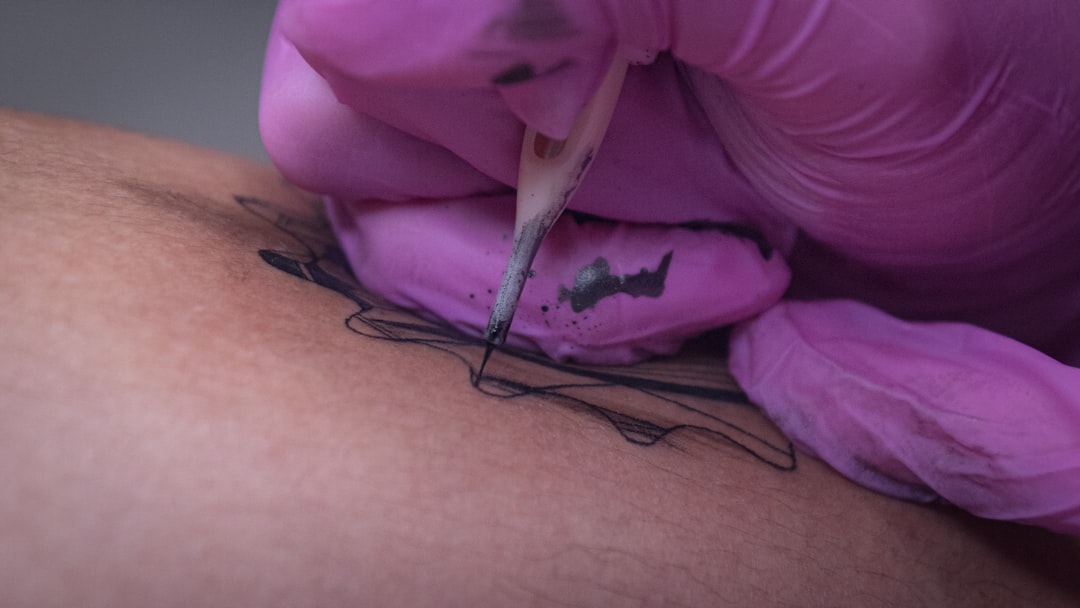
Every tattoo artist knows that sinking feeling when a line bleeds more than expected or a gradient looks muddy on healed skin. Most of the time, the culprit isn’t technique alone. It’s the needle. Choosing the right needle configuration directly shapes your line quality, ink saturation, skin trauma, and how well a piece heals. Whether you’re laying crisp script or blending a soft watercolor wash, understanding your needle options gives you real control over the final result and builds the kind of confidence that clients feel the moment they sit in your chair.
Table of Contents
Key Takeaways
| Point | Details |
|---|---|
| Know your needle groups | Each tattoo needle configuration offers a unique effect, so identify their best uses for precision. |
| Match needle to design | Choosing the right type for the task ensures results that are both vibrant and heal efficiently. |
| Experiment to grow | Trying new needles and techniques accelerates your development as a tattoo artist. |
| Use guides and resources | Reference charts and community resources can help you make informed decisions in the studio. |
How to evaluate tattoo needle types for your work
Before you can make smart needle choices, you need a shared language for what you’re evaluating. Tattoo needles are organized into a few broad groupings: round needles (which include liners and shaders), magnum needles, and flat needles. Each grouping has sub-types suited to specific tasks. Knowing the grouping is just the first step.
Gauge and taper matter a lot. Gauge describes the thickness of each individual needle point. A standard gauge is #12 (0.35mm), while bugpin needles run at #10 (0.30mm) or finer. Thinner gauge means less trauma but also slower ink flow. Taper refers to the length of the needle’s sharpened tip: long tapers move ink more slowly and create softer lines, while short tapers deliver bolder, more saturated strokes.
Other factors that influence your choice include:
-
Skin type: Thinner or more sensitive skin benefits from lower trauma configurations like curved magnums or bugpins.
-
Pigment viscosity: Thicker, heavily pigmented inks perform differently through tight needle groupings versus spread ones.
-
Tattoo style: Realism needs fine gradients; traditional work needs bold, clean lines; geometric work demands precision above all.
-
Single use vs. multi-use: Always prioritize single-use, sterile, pre-packaged needles for safety and consistent performance.
Pro Tip: Keep a set of practice skins at your station and test any new needle configuration before using it on a client. What feels right in theory sometimes behaves differently on actual skin, and practice skins let you dial in your settings first. If you want to build a professional setup that supports your growth, check out the artist booking and deposit guide for practical business tips that complement your technical skills.
With criteria for selection clarified, we can break down each main tattoo needle type.
Round liner needles: Sharp lines and detail work
Round liner needles (labeled RL) are grouped in a circular pattern and soldered tightly together. That tight grouping is precisely what makes them so effective for clean, consistent lines. The needles all exit the tip in a cluster, driving ink into the skin in a controlled, narrow channel.
The numbering system tells you how many needle points are in the group. A 3RL has three points, a 5RL has five, a 9RL has nine, and so on. Smaller configurations like 3RL or 5RL are ideal for fine detail and delicate script. Larger configurations like 9RL or 14RL lay down bolder outlines faster. Here’s a quick reference for common round liner uses:
-
3RL and 5RL: Fine lines, delicate lettering, micro detail work
-
7RL: Standard outlines and versatile line work across most styles
-
9RL and above: Bold traditional outlines, thick geometric lines, fast coverage
“Round liners should be your go-to for consistent sharp lines in classic tattooing styles.”
If you’re building your skills or exploring new styles, visiting tattoo artist blog resources is a great way to stay current with what’s working for artists across the community. Understanding line work leads us to needles for shading and color fills.
Shader and magnum needles: Filling and blending mastery
Shader needles come in two main varieties: round shaders (RS) and flat shaders (FS). Unlike round liners, the grouping on shader needles is slightly looser. That spacing lets ink spread more evenly, making them perfect for soft fills and smooth transitions inside already-outlined areas.
Magnum needles take shading to the next level. They are arranged in two offset rows, which creates a wider needle surface that distributes ink more evenly across larger areas. This is why experienced artists rely on magnums for big color fills, smooth gradients, and blending backgrounds. The two main magnum types are:
-
M1 (curved or soft magnum): The needles are curved slightly, which follows the contour of the skin and reduces unnecessary trauma. Great for realistic shading and sensitive placements.
-
M2 (stacked magnum): Tighter stacking gives bolder coverage, ideal for solid color fills and heavy shading.
| Feature | Curved magnum (M1) | Round shader (RS) |
|---|---|---|
| Needle arrangement | Two offset rows, curved | Circular, loose grouping |
| Best use | Large gradients, blending | Small fills, soft transitions |
| Ink flow | High, even distribution | Moderate, controlled spread |
| Skin trauma | Low to moderate | Low |
| Recommended area | Large surfaces | Small to medium areas |
Pro Tip: Use curved magnums on ribcage, neck, and inner arm placements where skin is more sensitive. The curved profile keeps needle contact gentle and consistent, reducing the chance of blowouts. When a client has specific requests about style or placement that affect your needle choice, the advice in handling client requests can help you navigate those conversations confidently.
With shading and filling covered, let’s explore specialty needles for unique effects.
Flat and specialty needles: Defining edges and textures
Flat needles are arranged in a straight single row. That linear configuration lets them punch a wide, even line of ink in a single pass, making them especially effective for sharp geometric edges, tribal fills, and bold color packing. A single stroke with a flat needle covers more area than a round liner of the same point count, which speeds up coverage significantly.
Specialty needle types give you even more creative control:
-
Bugpin needles: These use an extra-fine gauge (#10 or smaller). They create incredibly soft, smooth lines and are widely used in realism and portrait work where subtle gradients matter most.
-
Textured magnums: The needle points have a rougher surface that holds more ink per dip, resulting in richer, more saturated color in fewer passes. Excellent for bold traditional fills and solid backgrounds.
-
Hollow needles: Designed with a hollow center that reduces the amount of pigment deposited per pass. This creates a subtle, wash-like effect that works well for watercolor and painterly styles.
| Needle type | Best use case | Effect on skin | Ink deposit |
|---|---|---|---|
| Flat | Geometric edges, tribal | Moderate | High per pass |
| Bugpin | Realism, fine detail, soft shading | Very low | Low, controlled |
| Textured magnum | Solid fills, bold color | Moderate | Very high |
| Hollow | Color washes, watercolor style | Very low | Minimal |
Having explored all main and specialty needle types, artists face the practical decision: which is best for each project?
How to choose the right needle for your design
Making the right needle call comes down to a clear process. Follow these steps before every session:
-
Identify the primary task: Is this session focused on lining, shading, color packing, detail work, or a combination? Each task has an ideal needle type.
-
Consider the style: Traditional and neo-traditional work prioritizes bold liners and magnums. Realism needs bugpins and curved magnums. Geometric and blackwork benefit from flat needles and tight round liners.
-
Think about the placement: Sensitive areas like ribs or inner arms need lower-trauma options. More resilient areas like the outer arm or thigh can handle standard configurations.
-
Check your ink: Heavy, opaque pigments flow differently than light washes. Match needle flow rate to ink viscosity for consistent results.
-
Troubleshoot healing feedback: If past clients report fading, muddiness, or blowouts in specific areas, your needle choice may be a contributing factor. Reevaluate your configuration for that style or placement.
Pro Tip: Build a simple reference chart and laminate it for your station. List each needle type, its best style applications, and your preferred machine settings for each. It eliminates guesswork mid-session. For more insights on refining your craft, tattoo industry tips covers a wide range of practical advice from artists who’ve been through it all.
The overlooked power of experimentation
Here’s something most needle guides won’t tell you directly: the artists who plateau fastest are the ones who find two or three configurations that work and never look beyond them. It’s understandable. Consistency feels safe when a client is in your chair. But sticking to the same needle setups session after session quietly limits your range.
Trying a curved magnum on a piece you’d normally shade with a round shader often produces a smoother, more professional blend. Running a bugpin where you’d normally use a standard liner can add a level of softness that elevates portrait work dramatically. These discoveries don’t happen by reading about them. They happen when you set aside a practice session specifically to experiment.
The real growth comes from treating your needle selection as a variable you’re always optimizing, not a fixed habit. Keep notes on what worked and what didn’t. Review results after pieces heal. Adjust your setups based on real outcomes. Visit artist practice and innovation to connect with ideas and techniques from artists who share this mindset. The real artistry begins when you break out of your comfort zone, one needle at a time.
Connect with fellow artists and streamline your bookings
Growing your technical skills is only part of the picture. Running a sustainable tattoo business means managing your time, clients, and bookings with the same precision you bring to your needle work.
Ink Link is built for artists like you. On the platform, you can connect with artists in the community for inspiration and collaboration, discover tattoo studios to find your next home base or compare how other studios operate, and manage your entire booking workflow in one place. From client records to payments and calendar management, Ink Link keeps the business side organized so you can stay focused on the creative side. Check out see pricing details to find the plan that fits where you are right now.
Frequently asked questions
What does the needle gauge mean in tattooing?
Needle gauge refers to the diameter of each individual needle point and directly affects how much ink flows and how much trauma is caused to the skin. Finer gauges like bugpins deposit less ink per pass and are gentler, while standard gauges deliver faster saturation.
When should I use round shader needles instead of magnums?
Round shaders excel at filling small areas and creating smooth color transitions in tight spaces, while magnums are the better choice for large, even shading across broader sections of skin.
Are bugpin needles only for realism tattoos?
Bugpin needles are most popular for detailed realism and portrait work, but they also work well for soft shading in fine-line, watercolor, and minimalist styles where subtle gradients are important.
How do I prevent excessive skin trauma when using magnum needles?
Keep your machine voltage in the appropriate range for your needle and ink, move at a steady pace without overworking any single area, and consider switching to a curved magnum on sensitive placements for a gentler contact angle.
Is it necessary to use different needles for lining and shading?
Yes, using the right specialized needle for each task produces sharper lines, smoother shading, better color saturation, and greater comfort for your client throughout the session.